
GoPro Rock Climbing Tips for Stunning Action Footage
Rock climbing is an exhilarating adventure that not only challenges your physical and mental limits but also offers breathtaking views and unforgettable moments. Capturing these moments with a GoPro can turn your climb into a cinematic masterpiece. Whether you're a seasoned climber or a beginner, here are some essential tips to help you get the most out of your GoPro while rock climbing.
Why Use a GoPro for Rock Climbing?
Before we dive into the tips, let's talk about why a GoPro is such a great choice for rock climbing.
- Compact and Lightweight: A GoPro is small and lightweight, making it easy to carry and mount on your gear.
- Durable and Waterproof: These cameras are built to withstand harsh conditions, including water, dust, and drops.
- High-Quality Video and Photos: GoPros offer excellent video and photo quality, even in low-light conditions.
- Versatile Mounting Options: You can attach a GoPro to almost anything, from your helmet to your chest harness.
Essential Gear for Your GoPro Rock Climbing Adventure
To get the best footage, you'll need a few key pieces of gear. Here’s what you should consider:
- GoPro Camera: The latest models, like the GoPro HERO10 Black, offer the best features and performance.
- Mounts and Accessories:
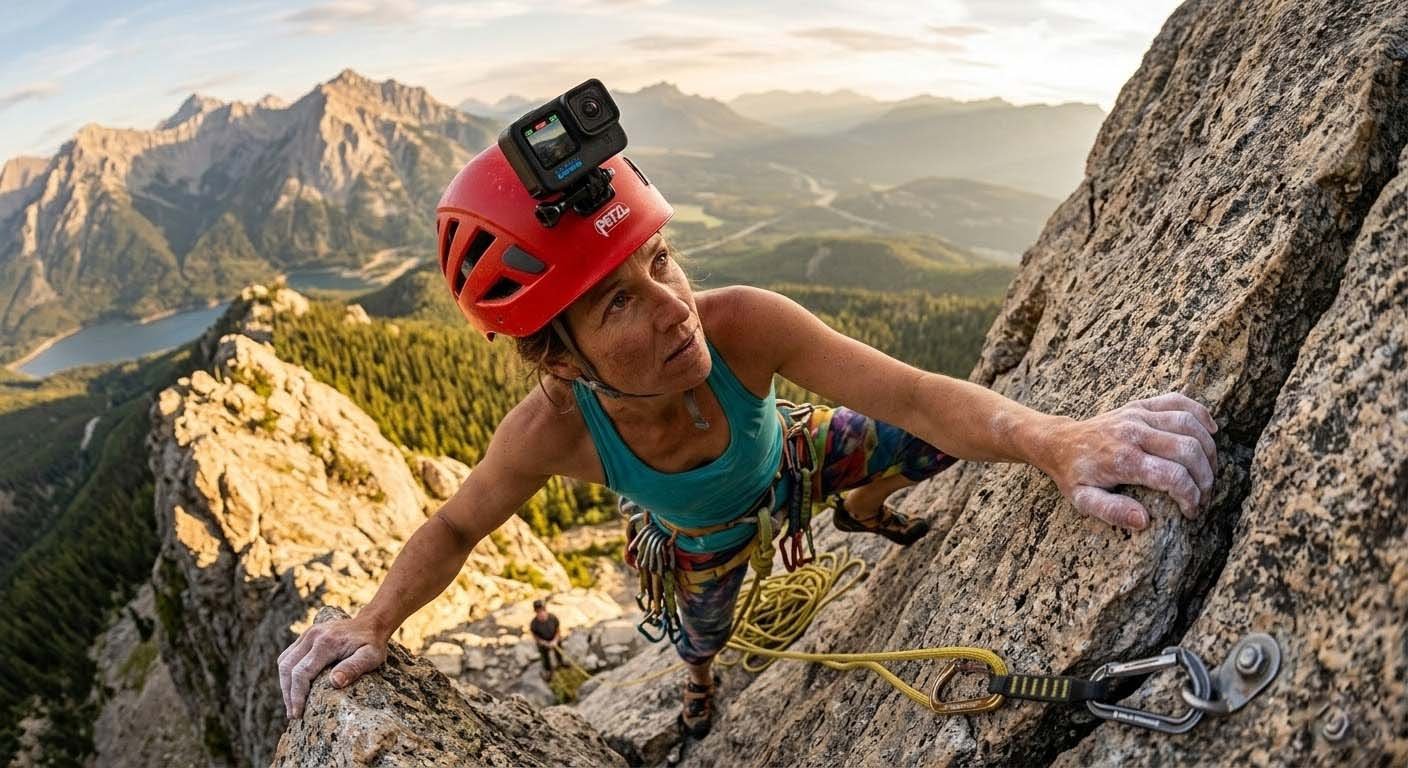
- Helmet Mount: Attach your GoPro to your helmet for a first-person perspective.
- Chest Harness: Capture a unique angle and keep your hands free.
- Clamp Mount: Secure your camera to your backpack or other gear.
- Extension Pole: Get a wider shot or a different angle.
- Extra Batteries and Memory Cards: Climbing can be a long activity, so make sure you have enough power and storage.
- Protective Case: Keep your GoPro safe from scratches and impacts.
Setting Up Your GoPro for Optimal Performance
Now that you have your gear, let's set up your GoPro for the best possible footage.
Choose the Right Settings
- Resolution and Frame Rate:
- For smooth, high-quality footage, set your GoPro to 4K at 60 frames per second (fps).
- If you prefer a more cinematic look, try 2.7K at 60 fps.
- Field of View (FOV):
- Use the Wide FOV for a broader view, which is great for capturing the entire scene.
- The Linear FOV is ideal for reducing the fish-eye effect and giving a more natural look.
- Stabilization:
- Enable Hypersmooth stabilization to reduce camera shake and get smoother footage.
- This feature is especially useful when you’re moving around or climbing on uneven terrain.
Positioning Your GoPro
Where you place your GoPro can make a big difference in the type of footage you capture. Here are some popular mounting options:
- Helmet Mount:
- Pros: Provides a first-person perspective, allowing viewers to see exactly what you see.
- Cons: Can be a bit wobbly if not mounted securely.
- Chest Harness:
- Pros: Keeps your hands free and provides a stable, wide-angle view.
- Cons: May not capture as much of your face or upper body.
- Clamp Mount:
- Pros: Versatile and can be attached to various parts of your gear.
- Cons: May not be as secure as other mounts.
- Extension Pole:
- Pros: Allows you to get creative with angles and shots.
- Cons: Requires one hand to hold, which can be inconvenient during climbs.
Tips for Different Types of Climbs
Different types of climbs require different approaches. Here are some specific tips for bouldering, sport climbing, and traditional climbing.
Bouldering
Bouldering involves short, intense climbs without ropes. Here’s how to capture the action:
- Use a Chest Harness: This keeps your hands free and provides a stable, wide-angle view.
- Position Your GoPro Low: Lowering the camera can give a more dramatic and dynamic feel to your footage.
- Capture the Landing: Don’t forget to film the landing, as it’s often just as exciting as the climb itself.
Sport Climbing
Sport climbing typically involves longer routes with fixed bolts. Here’s how to get the best footage:
- Helmet Mount: This provides a first-person perspective and allows viewers to see the route and your movements.
- Use an Extension Pole: Capture the height and scale of the climb by using an extension pole to get a wider shot.
- Film the Clipping: Show the process of clipping into the bolts, as it adds to the story and excitement.
Traditional Climbing
Traditional climbing, or trad climbing, involves placing your own protection as you climb. Here’s how to capture the experience:
- Chest Harness: This keeps your hands free and provides a stable, wide-angle view.
- Capture the Protection Placement: Show the process of placing and removing protection, as it’s a crucial part of trad climbing.
- Use Multiple Angles: If possible, use multiple GoPros to capture different perspectives, such as a helmet mount and a chest harness.
Editing Your GoPro Footage
Once you’ve captured your footage, it’s time to edit it into a compelling video. Here are some tips to help you create a stunning final product:
Organize Your Footage
- Label Your Clips: Use descriptive names for your clips to make it easier to find them later.
- Create Folders: Organize your footage into folders based on the type of climb or the location.
Choose the Right Software
- GoPro Quik: This is a user-friendly app that comes with many GoPro cameras and offers basic editing features.
- Adobe Premiere Pro: For more advanced editing, Adobe Premiere Pro is a powerful tool that offers a wide range of features.
- Final Cut Pro: Another professional-grade option for Mac users.
Edit Your Footage
- Trim and Cut: Remove any unnecessary footage to keep the video engaging.
- Add Transitions: Use transitions to smoothly move between different clips.
- Add Music: Choose a soundtrack that complements the mood and energy of your video.
- Color Correction: Adjust the color and brightness to enhance the overall look of your footage.
- Add Text and Titles: Include text and titles to provide context and information.
Share Your Video
- YouTube: Upload your video to YouTube and share it with the world.
- Social Media: Post snippets or teasers on platforms like Instagram, Facebook, and Twitter to generate interest.
- GoPro Community: Share your video on the GoPro community forums to connect with other GoPro enthusiasts.
Conclusion
Capturing your rock climbing adventures with a GoPro can be incredibly rewarding. By following these tips, you’ll be able to create stunning, high-quality footage that captures the excitement and beauty of your climbs. Remember to choose the right settings, position your GoPro effectively, and edit your footage to tell a compelling story. Happy climbing and filming!
If you have any questions or want to share your own GoPro rock climbing tips, leave a comment below. We’d love to hear from you!


Leave A Comment